
By Robert · Updated
Choosing a scuba gear bag is easier when you separate three jobs: carrying wet equipment to the water, protecting delicate items in transit, and packing for a flight. One bag can sometimes cover more than one job, but a ventilated boat bag and a checked travel suitcase solve different problems. Start with the route your equipment will take, the kit you actually own, and the load you can comfortably handle. Capacity in liters is useful only after those questions are answered.
Map the journey before choosing the bag
Picture a normal diving day from start to finish. You might carry equipment down stairs at home, load it into a small car, walk over gravel to a marina, then transfer it into the operator’s storage area. Each transition exposes a different weakness. Wheels help on smooth terminal floors but become a burden on loose sand. A backpack frees your hands on steps but puts the full equipment load on your shoulders. Long handles may be comfortable in a car park while catching on other equipment in a cramped boat aisle.
List the most awkward transition, rather than the easiest one. If your longest carry is from a parking area to the shore, carrying comfort matters more than how neatly the empty bag folds. If your operator provides storage boxes aboard, ask whether an oversize roller can stay on the boat at all. Matching the bag to an actual journey prevents paying for features you cannot use.
Make a full equipment inventory
Lay out your fins, boots, BCD, suit, mask case and accessories before comparing bags. Include the things that disappear from a product photograph: a hood, gloves, spare straps, a towel, a surface marker, a reel and any permitted tools. Decide which items will travel separately. A regulator may need a protective case; a computer may travel in your cabin bag. Cylinders and loose lead are a separate transport question and should not be assumed to belong inside ordinary luggage.
Use your present equipment as the baseline, then allow for a realistic addition. A bag bought around a thin holiday suit can become difficult to close when you bring thicker exposure protection. Conversely, an enormous bag encourages loading equipment that is better split into manageable pieces. Write down the inventory so you can repeat the same packing test with each candidate.
Measure the longest and most awkward pieces
Fins often set the minimum useful internal length. Measure the complete fin, including a projecting heel strap where relevant, and compare it with usable space rather than the bag’s outside dimension. Padding, wheel housings, curved corners and internal dividers can reduce the length available. External fin pockets also have limits; the manufacturer’s phrase “fin pocket” does not establish that your exact size fits.
A BCD presents a different challenge. Some fold easily according to their instructions; others contain rigid components or structures that should not be forced into a compact shape. Try packing without crushing the bladder, sharply bending hoses or using the zipper to compress an overfilled load. Our air-travel packing guide explains how to protect these components when space is limited.
Mesh bags for wet equipment
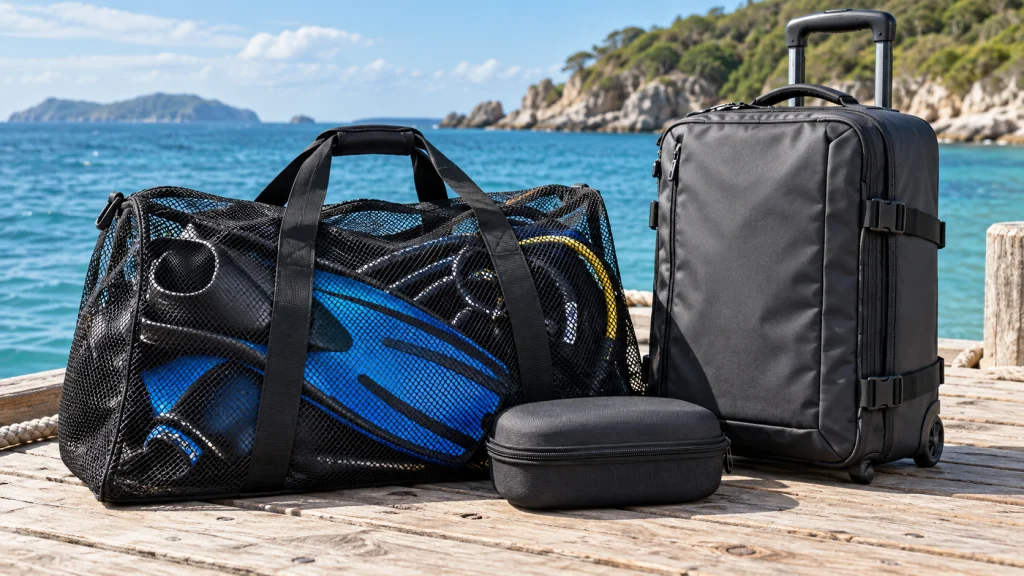
Mesh lets water drain and air circulate around the contents. That makes it useful between a rinse area and the boat, particularly when you want to see or reach equipment without opening several compartments. It also means water, sand and outside objects can pass through the material. A mesh bag should not be treated as protection for a phone, travel documents or a bare computer screen.
Inspect the base and handle attachment points. A reinforced bottom may reduce abrasion, but it can also collect water if the design lacks drainage. Look at whether the mesh can snag small buckles or exposed clips. Fine items may need a separate pouch. Ventilation reduces one storage problem; it does not make it sensible to leave damp equipment tightly packed for days.
When a roller bag earns its weight
A roller is useful when the ground is suitable and the loaded bag would otherwise require a long carry. Compare the empty weight as well as capacity. A protective frame, large wheels and an extending handle all consume part of an airline allowance. That trade-off can be worthwhile, but only if the remaining allowance accommodates the equipment you plan to pack.
Check lifting handles on the sides and ends. Eventually someone will lift the bag into a vehicle or onto a baggage belt. The telescoping handle is not necessarily intended for that job. Wheels also need protection from salt, hair and grit. Ask whether replacements can be obtained, and inspect whether the wheel assembly protrudes beyond the main body where impacts are more likely.
Backpack and duffel carrying systems
A backpack can suit short walks where rollers struggle, but assess it with a representative load. Shoulder padding alone does not establish comfort. Strap spacing, adjustment range, the position of hard items inside, and how high the bag sits can all matter. Make sure an edge of a fin or a rigid accessory is not pressing against your back. If a shop permits, walk, turn and negotiate a step during the fitting.
A duffel offers a wide opening and can be simple to load into a vehicle. Long shoulder straps may be less convenient on stairs or when carrying a separate cylinder. Check whether handles can be joined and whether the shoulder strap is removable. Loose straps are worth securing before checking luggage; follow the bag maker’s instructions rather than assuming every strap is safe to leave exposed.
Separate drainage from waterproofing
A dry bag is intended to resist incoming water when its closure is used as specified. A wet-gear bag may instead be intended to contain dripping equipment. Neither description should be stretched into a claim that the bag can be submerged. Check the maker’s actual rating, closure instructions and limitations. Stitching, zippers and seams often matter more than the appearance of coated fabric.
For a mixed load, protect dry belongings separately. An internal pocket can share moisture with the main compartment even when it keeps objects organized. Do not pack a phone or passport against a dripping suit and rely on a divider. Likewise, a watertight bag containing wet gear traps moisture inside; open it and dry the equipment once you reach an appropriate place.
Protect instruments with a deliberate packing plan
A gear bag is an outer container, not a complete protective system. Put the mask in a suitable case and keep heavy objects off its skirt. Support a regulator assembly without tightly bending its hoses. Keep gauge and computer faces away from gritty buckles and metal clips. A small padded pouch can be more useful than several thin external pockets that provide little impact protection.
Plan access as well as protection. If the operator needs to inspect equipment or you need a computer before boarding, it should not require unloading the entire bag onto a wet dock. Keep important small items together so they can be counted. An organized layout also makes it easier to notice that a strap or accessory was left at the rinse station.
Judge closures and construction realistically
Open and close each zipper through its full travel. Check whether the opening is large enough to load the BCD without dragging its fittings over the teeth. Covered zippers may resist some exposure but are not a guarantee against corrosion or grit. Rinse and care for closures according to their instructions; forcing a jammed slider can create damage that was avoidable.
Look at seams around the handles and any abrasion panels on the bottom. Consider where the bag will actually rub: a car boot, concrete dock or boat deck. A thin foldable mesh bag and a structured roller can both be appropriate purchases, but they should not be compared as though they offer identical protection. Repairability and available hardware can be practical deciding factors between otherwise similar designs.
Check the loaded weight before committing
Weigh the packed bag and lift it with the handles you will use. A comfortable carry while standing still may feel different after several minutes or a flight of stairs. If the bag requires awkward twisting or cannot be loaded safely into your vehicle, split the load. A larger published capacity is not a recommendation to fill it to the top.
For flying, check the actual carriers, all flight segments, and any special-equipment conditions. Outside dimensions can include wheels and handles. An allowance granted on one ticket may not apply to another. Compare the total packed weight with the allowance after adding toiletries and other travel items, rather than treating the luggage’s empty specification as the final answer.
Dry the equipment before putting the bag away
After a trip, remove the contents and deal with each component separately. A bag that looks empty can still hold a wet hood in a side pocket. Shake out sand, clean the bag as its maker directs and let the lining, seams and pockets dry. Do not close it around damp neoprene and assume ventilation in the storage room will reach the center of the load.
The bag is usually transport storage rather than the best long-term home for every item. Follow the advice for storing scuba equipment between trips and caring for fins. DAN’s gear care guidance gives a useful overview of keeping equipment clean, dry and protected from heavier objects. Compare the documented compartments and carrying arrangements in our scuba gear bag guide using that packing list.
A practical shortlist
Before buying, compare two or three bags using the same inventory. Record usable length, packed weight, carrying comfort, access to delicate items, wet-gear handling and storage requirements. Reject a bag if it requires damaging compression, leaves your instruments unprotected or makes an ordinary transfer difficult. Then compare price and the smaller conveniences. Choosing around those practical tests gives you a bag that supports your diving routine instead of one that merely looks impressive in an empty product photograph.
About the author
Robert
Robert writes about scuba-diving equipment for GearDeep, focusing on fit, compatibility and the practical differences between products. His buying guides use manufacturer specifications and manuals to help readers compare their options, understand important limitations and make informed equipment choices.