By GearDeep Editorial · Updated
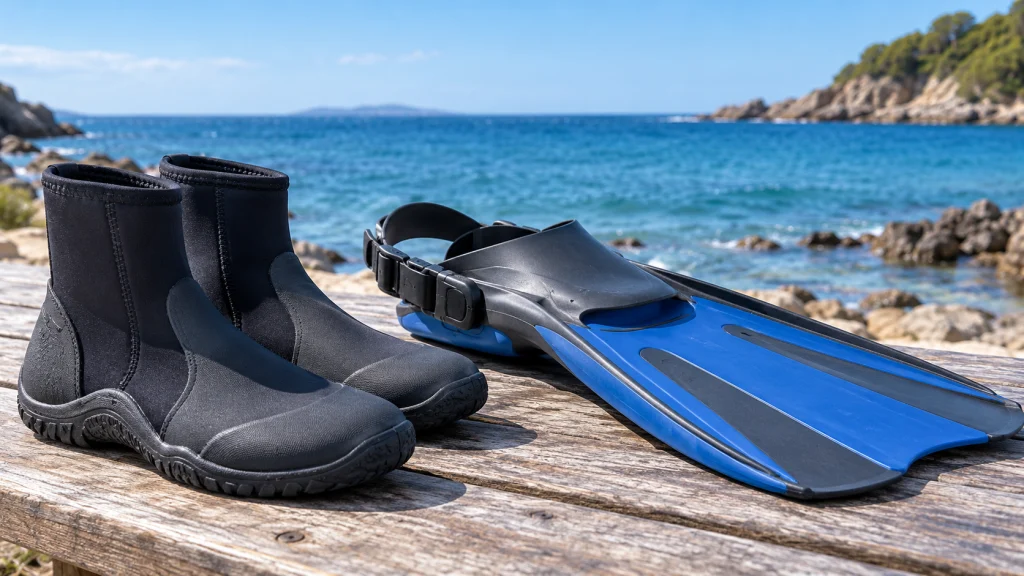
Learning how to choose dive boots for open-heel fins means fitting the boot and fin together. The boot’s size, sole shape, upper thickness and heel profile all change how the foot sits in the pocket and how the strap retains it. Start with the footwear you need for the dive site, then check compatible fins. A comfortable boot on its own can still be a poor match for an otherwise suitable fin.
Decide what the boot needs to do
Consider the entire route to and from the water. A boat diver may step only a short distance across a deck, while a shore diver may cross gravel, uneven rock or a long approach. The boot needs to suit those conditions without becoming unnecessarily bulky inside the fin. No ordinary dive boot should be assumed puncture-proof or suitable for every surface.
Consider the exit as carefully as the entry. The path may feel different while carrying wet equipment or after a tiring dive. Ask the local operator about the approach, changing facilities and recommended footwear. The right question is not simply which boot has the hardest sole, but which combination of protection, flexibility and fin fit supports the actual diving routine.
Open heel does not mean universal boot compatibility
Open-heel fins use a strap across the back of the foot, but the dimensions of their pockets vary. Some are designed for substantial boots, while certain travel models are intended for a different footwear arrangement. Read the exact fin instructions. A label that says “adjustable” describes a retention feature, not an unlimited size range.
Bring both boots when trying fins. Test the complete pair because differences between feet can be noticeable. Do not judge a combination only by pulling the strap far enough to reach the heel. The boot must sit properly in the pocket, with suitable support and retention. Our open-heel versus full-foot comparison explains why heel style is only the beginning of the fit decision.
Measure feet using the manufacturer’s method
Start with the boot maker’s current size chart and measuring instructions. Ordinary shoe size can help you find a starting point, but it does not account for every brand’s last, width or lining. Measure both feet and consider the larger measurement when following the chart. Include any socks or layers that the boot and equipment configuration are intended to accommodate.
Try the boots at a time and in a setting that allow a realistic assessment, rather than rushing through the process before a trip. Keep the return conditions in mind when ordering online. If a chart gives only approximate size conversions, ask the supplier how the specific model fits instead of assuming a half-size difference can always be solved by stretching neoprene.
Check toes, heel and instep
Your toes should not need to curl to fit inside the boot. Notice pressure over the instep, around the heel and at the ankle. A boot that feels comfortable while standing still may reveal a problem when you flex the ankle or take several steps. Check for excessive sliding as well as compression.
Do not make the fin strap responsible for correcting a boot that is much too large. Movement inside the boot and movement of the boot inside the fin are separate problems. Equally, choosing a very tight boot to make a larger fin feel secure can create another source of discomfort. Deal with each fit in sequence: foot to boot, then boot to fin.
Compare sole profile and stiffness
A thicker or more structured sole may help with the intended walk, but it also changes the space the boot occupies in the fin pocket. Look at the shape around the toes and the side edges, not just the thickness beneath the heel. Two boots with the same nominal size may fit a pocket differently because one has a wider protective outsole.
Test ordinary walking and the ankle movement used in your trained finning technique. A rigid sole can feel reassuring on land but may not match every fin design or personal preference. A soft sole can pack neatly while offering less structure for a rough approach. Those are practical trade-offs; neither feature establishes a universal performance advantage.
Thickness is part of an exposure system
Neoprene thickness is one consideration in warmth, alongside fit, construction, water movement, duration and personal thermal needs. A millimeter label is not a safe-temperature guarantee. Discuss the planned conditions with the operator or instructor, particularly when moving to colder water or changing other exposure equipment.
Check how the boot interfaces with the suit leg. The intended overlap depends on the garments and configuration. Do not assume a boot designed for an ordinary wetsuit has the same role as footwear worn with a drysuit system. For the broader decision, read choosing wetsuit thickness and apply the instructions for the exact equipment rather than mixing generic recommendations.
Assess zippers and entry openings
A zipper may make a substantial boot easier to put on, while a pull-on design avoids that particular closure. Try getting the boot on and off without pulling hard on a small panel or seam. Check whether a zipper flap or closure sits where the fin pocket will press against it.
When the boot is fitted, look for a gap or fold that changes when the ankle bends. Operate the zipper gently through its intended travel and inspect any retaining closure. Do not force a zip closed around a fit that is clearly too tight. Salt and grit can also affect closures, so include zipper care and replacement support in the purchase decision.
Check the heel strap with the boot seated
Once the boot sits appropriately in the pocket, assess the strap according to the fin maker’s instructions. It should remain in its intended position without painful tension or excessive looseness. A bungee or spring strap may have a limited adjustment or size range. Conventional buckle straps also have limits and should not be stretched beyond the intended setup.
Look at the back of the boot. Some shapes provide a particular retention feature, but it must suit the strap you use. Make sure a protruding seam or zipper component does not become a pressure point beneath the strap. If the combination works only when the strap is placed unusually high or low, ask a knowledgeable shop to reassess it.
Test with gloves and the rest of the kit
If you normally wear gloves, use them when assessing the practical handling of your fins. Check whether you can identify and operate the retention hardware as trained, without yanking on the boot or balancing awkwardly. How you put on and remove equipment depends on the site and operator, so discuss the full routine rather than practicing an unfamiliar method alone.
A shop trial should also consider where the boots will sit during transport and changing. Wet boots can be bulky, and a rigid sole may take more bag space than expected. Those issues do not outweigh fit, but they matter when deciding between equally suitable options for frequent travel.
Recognize a mismatch before using it on a dive
Warning signs include persistent pinching, numbness, rubbing, heel lift, repeated strap movement or a boot that does not seat as the fin instructions describe. Do not assume these will disappear after a demanding swim. Stop the assessment and try a different size or shape, with professional help if needed.
Avoid comparing combinations using different fin sizes without recording what changed. A short note stating boot model, boot size, fin model and fin size can save confusion when ordering later. Where a controlled water trial is available, use an appropriate supervised setting before taking unfamiliar equipment into more challenging conditions. Dry fit is necessary, but it is not a complete in-water assessment.
Care for the boot and fin separately
After diving, rinse each as directed and check areas that trap sand. Separate the boot from the fin to allow both to dry properly. A clean-looking sole does not mean the lining inside the toes is dry. Inspect the zipper, seams and any heel-retention feature before storing the pair.
Keep the fin blade straight and the boot free from prolonged crushing. Follow fin care guidance and the boot’s own instructions for cleaners and drying. Planning that routine also helps with packing: wet footwear needs a temporary transport arrangement, then a proper chance to dry when the trip ends.
Keep the combination identifiable
Retain the fin and boot model details after finding a comfortable combination. A replacement sold under a similar family name can have a different outsole, pocket or strap. If one item changes, repeat the fit checks rather than assuming the old size pairing remains valid. This is particularly useful when keeping a second pair at a holiday destination: the boots stored there may be thicker or shaped differently from the ones used during your original shop fitting.
Three common buying situations
For warm-water boat trips, you may prioritize modest bulk and a comfortable pocket fit, provided the footwear still suits the deck and operator’s routine. For a rocky shore approach, sole protection and walking stability may become more important. For a colder destination, review the complete exposure system and make sure the fin accommodates the chosen footwear without painful compression. Then compare the boot-pocket and heel-system distinctions in our scuba fins guide with the actual footwear you intend to use.
In each case, start with the actual requirements and verify the combination. PADI’s scuba footwear discussion highlights trying open-heel fins with the boots you use. Manufacturer guidance, a careful fitting and appropriate familiarization are more reliable than choosing a boot from shoe size and neoprene thickness alone.
About the author
Robert
Robert bohat acha bacha hay