
By Robert · Updated
Knowing how to clean and store a scuba wetsuit starts with a simple distinction: rinsing removes the residue from a dive, while drying and storage protect the garment between uses. A suit can look clean outside and still contain damp seams, salt, sand or an odor-producing lining. Follow the instructions for your exact suit, especially if it has specialized linings, seals or zipper treatments. The routine below concerns ordinary wetsuit care; it is not a drysuit servicing procedure.
Read the care label before using a cleaner
Neoprene suits differ in their outer fabrics, inner linings, adhesives, seam treatments and closures. A cleaner approved for one garment is not automatically appropriate for another. Locate the care label and the manufacturer’s current instructions while the suit is still new. Keep a photograph or saved copy with your equipment records so you can check it later without relying on memory.
Look for restrictions on washing machines, detergents, water temperature, sunlight and drying methods. If the label is missing, identify the model and ask the maker or an authorized dealer. Do not experiment with bleach, solvents or household stain removers because the outside fabric looks robust. A treatment that makes a lining smell cleaner can still damage a bonded seam or a surface finish.
Empty pockets and remove loose debris
Before rinsing, check any pockets and accessories. Remove loose items that could snag the lining or remain wet against the suit. Undo hook-and-loop closures carefully and secure them as directed so exposed hooks do not drag over soft fabrics. Inspect ankle and wrist areas for sand, particularly after a shore entry. Grit can remain inside a cuff even when the main body looks clean.
Work over a clean surface rather than leaving the suit on gravel or dragging it across a boat deck. Handle it by substantial sections of fabric; do not lift a water-heavy suit by a small seal, zipper pull or thin panel. This preliminary check also gives you a chance to notice a new abrasion before it becomes obscured by the next rinse or wash.
Rinse inside and outside
Use fresh water and the method specified by the manufacturer. Give attention to the inside because that is where perspiration and moisture can remain against the lining. Open folds at the armpits, crotch, knees and cuffs so water reaches them. A quick splash over the shoulders is not the same as rinsing the areas that have held seawater throughout the dive.
If using a tub, begin with clean water and avoid letting the suit sit in a gritty communal rinse that could add contamination. Do not use a fixed soaking time as a substitute for the care instructions. Some garments have specific treatment requirements. The practical aim is to remove residue without introducing unnecessary heat, chemicals, abrasion or stress to the suit’s construction.
Use wetsuit cleaner only when appropriate
An approved wetsuit cleaner can help when ordinary rinsing leaves an odor or residue. Check the dilution, contact time and rinsing instructions on both the cleaner and the suit. More concentrated solution is not automatically better. Mix only as directed, and avoid combining products. A cleaner intended for neoprene should not be assumed suitable for every specialized coating or accessory fitted to a garment.
An odor that returns immediately can indicate incomplete drying, dirty storage or a problem with another item packed beside the suit. Deal with the whole routine rather than repeatedly adding fragrance. Persistent unusual odor, visible growth or skin irritation warrants stopping use and seeking appropriate cleaning or manufacturer advice. Do not hide a problem by spraying the garment just before packing it.
Pay attention to the zipper
A zipper can hold fine sand and salt in places that are difficult to see. Rinse it in the orientation and condition the maker recommends. Operate it gently after cleaning, without forcing a slider past resistance. Check the surrounding fabric for a fold or loose thread. Pulling harder can turn a small obstruction into damaged teeth or a torn attachment point.
Use only the lubricant or treatment specified for that zipper, if one is recommended. Household oils and arbitrary sprays can affect surrounding materials and collect grit. Do not assume the procedure for a drysuit zipper applies to a conventional wetsuit zipper. If a closure repeatedly jams or separates, have it assessed before the next trip rather than planning to force it closed at the dive site.
Dry the lining, seams and hidden folds
Choose a shaded, ventilated location and use the support method recommended for the garment. The outer surface may feel dry while the inside remains damp, particularly in thicker panels or plush linings. Check cuffs, folded legs and the area around the zipper. Allow the inside and outside to dry, turning the garment only in a way that does not strain delicate sections.
Avoid judging readiness solely by how long the suit has hung. Humidity, airflow and garment construction change the drying time. A small enclosed bathroom can leave it damp much longer than a sheltered ventilated space. Keep it off heaters and other improvised heat sources. Drying more quickly is not an improvement if the method damages fabric, adhesive or neoprene.
Choose a suitable hanger or support
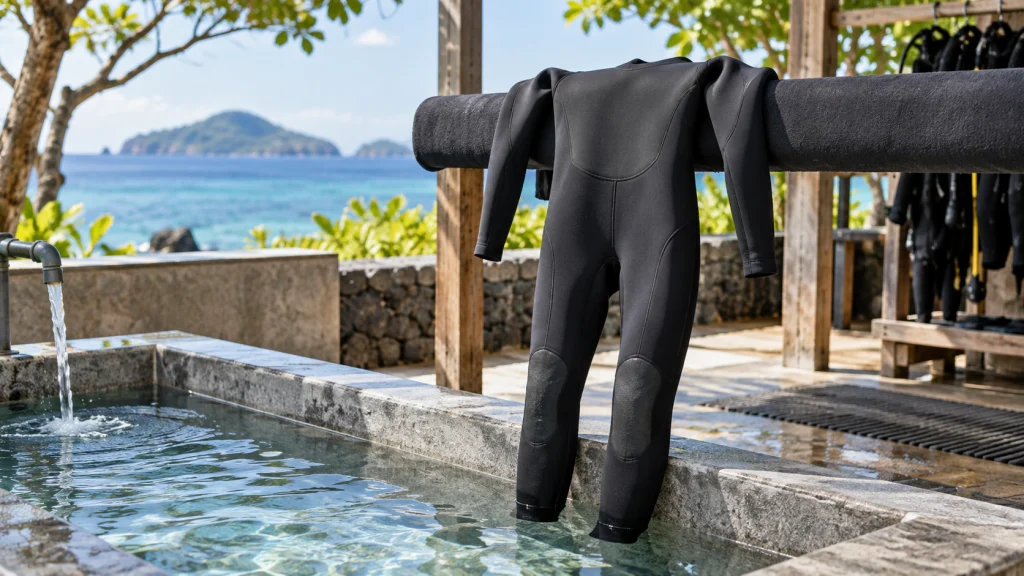
A thin wire hanger can concentrate a wet suit’s weight on a narrow shoulder area. A broad wetsuit hanger may distribute that load better, but the correct method still depends on the suit. Some instructions recommend supporting the garment folded over a broad bar rather than hanging it from the shoulders. Check the actual directions instead of adopting one rule for every construction.
Look at where the garment contacts the support. A sharp edge, exposed screw or dirty rail can damage or mark the fabric. Leave enough space that legs and sleeves do not stay pressed together. If several family members share a drying rack, spread the garments rather than hanging them as a tightly compressed row. Air needs a path to the surfaces that hold moisture.
Inspect after cleaning
Good light makes it easier to see worn areas on the knees, seat and elbows. Check seams for separation, exposed threads or a change in how a panel lies. Look for small nicks around cuffs, and inspect the zipper attachment. Stretching every seam aggressively is unnecessary; use the maker’s inspection guidance and ordinary careful handling.
Record damage when you find it. A photograph can help a repair service understand the location and change over time. Do not assume that a small hole can be repaired with any household adhesive. Appropriate products and techniques depend on the material and location. A repair near an important seal or closure deserves particular attention because a patch can change flexibility or fit.
Store the suit without persistent compression
For a long gap between trips, keep the clean, dry garment in a suitable cool, shaded storage space. Avoid putting a heavy equipment bag on top of it. Persistent folds and compression can leave the suit creased or distort areas that should sit smoothly against the body. If hanging is recommended, use an appropriate support and sufficient clearance below the legs.
Keep the suit away from chemicals, fuel, cleaning cupboards and direct heat. A car boot may be convenient for a diving weekend but can become a poor long-term storage location. Make the garment accessible enough that you can inspect it before a trip. Gear left buried beneath boxes tends to be discovered only when there is little time to arrange a repair or replacement.
Keep other neoprene items separate while drying
Boots, gloves and hoods can remain wet longer than the main suit. Do not roll them inside a dry garment and assume the whole load is ready for storage. Open each item as its construction permits and check the lining. Soles and reinforced palms can conceal damp areas from a quick surface touch.
Once everything is dry, organize it so paired items stay together without becoming tightly compressed. A ventilated storage area is useful, but ventilation cannot correct packing that traps a wet hood in a sealed pocket. Our equipment storage guide looks at this broader end-of-trip process and how to keep service reminders alongside the equipment.
Packing a wetsuit for a flight
Follow any folding instructions and avoid unnecessarily sharp creases. A suit can provide soft separation between some packed items, but it should not become a cushion for an exposed heavy object that presses into one panel throughout the journey. Protect instruments in their own suitable cases instead of relying entirely on neoprene padding.
If the garment must travel damp after a final dive, keep it separate from dry belongings and unpack it promptly at the destination. This is temporary transport, not storage. Check the airline’s baggage allowance before adding wet equipment, which can make the load heavier than the dry packing test. See packing scuba equipment for air travel for the rest of the equipment layout.
Recheck fit before the next diving trip
Care does not guarantee that an old suit still suits the next trip. Body measurements, garment condition and the planned conditions can all change. Try it on early enough to make a different arrangement if the zipper will not close comfortably or a panel restricts movement. Wear the underlayers you actually intend to use and check mobility in realistic diving postures.
If the suit has become compressed, loose or damaged, do not assume a thicker hood alone will compensate. Review the complete exposure-protection setup. Our wetsuit thickness guide explains why fit, exposure time and conditions matter alongside the millimeter label. A clean suit still needs to be suitable for the diving you are planning. If replacement is needed, compare the entry, hood and fit distinctions in our full-suit wetsuit guide rather than choosing thickness alone.
Build care into the end of the day
Give the suit a planned place to rinse, a safe way to dry, and enough time before the next pack. Keeping the routine simple makes it easier to follow after a tiring dive day. The useful sequence is to remove debris, rinse as directed, clean when needed, dry thoroughly, inspect and store appropriately. DAN’s gear care overview supports attention to rinsing and drying exposure protection; the suit manufacturer’s instructions settle the details for your garment.
About the author
Robert
Robert writes about scuba-diving equipment for GearDeep, focusing on fit, compatibility and the practical differences between products. His buying guides use manufacturer specifications and manuals to help readers compare their options, understand important limitations and make informed equipment choices.